Severed Halloween Finger Cookies
These are great to make on Halloween. I like to offer them to trick or treaters too as they come up. Very creepy looking and delicious at the same time.
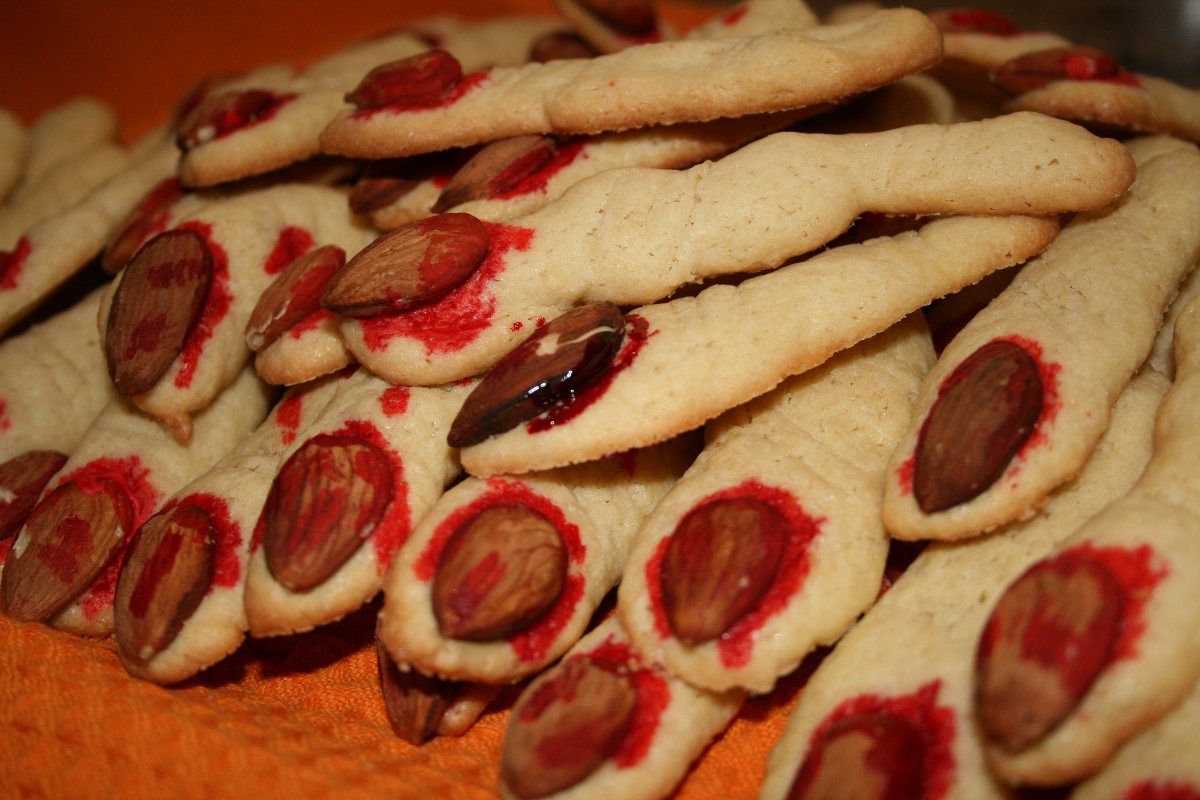
These are great to make on Halloween. I like to offer them to trick or treaters too as they come up. Very creepy looking and delicious at the same time.
- Carbohydrate 95.6470049615385 g
- Cholesterol 1191.906 mg
- Fat 72.6274761730769 g
- Fiber 4.95330057569146 g
- Protein 34.4284451730769 g
- Saturated Fat 32.54867155 g
- Serving Size 1 1 Dozen (332g)
- Sodium 1230.46435 mg
- Sugar 90.693704385847 g
- Trans Fat 5.66780832307693 g
- Calories 1164 calories
Step-by-step
- In a small bowl, combine the whole eggs, the egg yolks, the vanilla and almond extracts. Mix well.
- In a separate large mixing bowl, beat the butter, flour, powdered sugar, granulated sugar, and salt until well combined. Add the egg mixture to this large bowl and mix thoroughly to form your cookie dough.
- Unroll a rectangle of plastic wrap onto counter. Form a log shape with your dough and wrap dough in plastic wrap. Refrigerate dough for 30-40 minutes, or until firm.
- Line a cookie sheet with parchment paper. Preheat oven to 350 degrees F.
- When dough is firm, cut dough into 4 equal portions. Remove 1 portion at a time to work with, while keeping other portions refrigerated. With each portion of dough, divide into approximately 15 equal pieces and form your finger shapes by rolling dough in your fingers to create a cylinder shape. Work quickly while dough is cold, as the warmth of your hands may make your dough too moist. Lay out each finger cookie onto the parchment paper-lined cookie sheet.
- When all 15 fingers are done, take a sharp knife and indent ech finger with the wrinkles for the knuckles to make them look realistic. Then, take an almond and press one into the end of each finger to represent the nail. Bake at 350 degrees F for 12 minutes or until golden. Towards the end of the baking process, check cookies and indent again, if needed.
- When cookies are done, indent or make any changes necessary while cookies are still hot. Allow to cool on wire racks. Repeat process with remaining dough.
- When cookies are cool, make bloody effect if you wish. Mix red food coloring paste with water until you reach your desired shade of red color. Using a small pastry brush, "paint" your blood around the cuticle of each fingernail.
- These cookies may look gross, but they are very tasty!
A pale, buttery shortbread baked to a light golden edge yields a crumbly texture that contrasts satisfyingly with the firm crunch of a blanched almond nail at the tip. Keeping portions of dough chilled in a small refrigerator prevents the butter from melting under warm hands during shaping, which is essential because excess heat ruins the structural integrity required to hold detailed knuckle indentations. While standard all-purpose flour works predictably, bakers managing gluten sensitivities can successfully substitute a measured one-to-one gluten-free baking blend without altering the chill time or the three hundred fifty degree Fahrenheit oven temperature.
Standard metal baking sheets conduct heat rapidly, so lining them with unbleached parchment paper prevents the bottoms from browning prematurely before the centers finish baking through the twelve-minute window. Working in small batches preserves dough workability when counter space is limited, ensuring each cylinder maintains its slender, anatomical proportion before the knife makes contact. Pressing the blanched almonds firmly into the raw dough anchors them securely so they do not dislodge during the physical expansion that occurs in the hot oven.
Applying concentrated red food paste mixed with a drop of water yields a realistic viscous glaze that mimics freshly dried blood around the cuticle once the baked shortbread cools entirely on wire racks. A fine-tipped pastry brush provides absolute control over where the pigment settles, allowing it to pool naturally within the knife-scored knuckle crevices and around the base of the almond nail. Storing these baked goods in an airtight metal tin prevents ambient moisture from softening the crisp exterior over a period of several days.
Pairing these detailed novelty treats with dark roast black coffee or unsweetened spiced cider balances the high sugar content derived from the combination of powdered and granulated sugars in the dough. Strong beverage pairings cut through the rich butterfat load present in shortbread recipes, offering a clean palate cleanser between bites of the dense, almond-studded pastry.



